This is a blog for Android phone's apps and tips.If you are a user of Android phone so that you can follow this blog.That's all wish a great enjoy with your Android phone..........
We love apps. We love free apps. And we love paid apps that cost nothing most of all. But we don't like pirates, so if you have an eye patch on your face and a parrot on your shoulder, be gone with ye! Having said that, there's plenty of legal ways to get paid apps for free for your Android so today we're going to share a few with you.Here is our guide on how to get paid apps for free.
With the right tools you can get paid apps for free. Party time!
smartphones and tablets come with the toughest and most scratch-resistant touch screen panels, thanks to such materials like Corning Gorilla Glass. It takes a lot to break and damage them. This, on the other hand, is not impossible if you behave recklessly with your Android device. Here are our tips on how to protect your Android touch screen.
If you got a shiny new smartphone or tablet (perhaps you treated yourself or received it as a gift), you probably want to start playing with it immediately. But first of all it must be set up, and not everyone knows how with Android. In this beginners article, we'll explain step-by-step how to set up your new smartphone. You’ll see: it's easy!
Setting up your phone for the first time can seem daunting, but it's easy with our guide.
bahathir from xda have found a solution for this serious issue. He created anoptions file which contains a tweaked internet configuration file which would be responsible for a lightning fast 3G connection when it is applied on your device. The process involve modification of the internet configuration file to boost the 3G internet speed up to twice the older speed. To perform this trick (hack) you must have root access on your device since modifying a system file is required. The effect of this hack may vary from device to device because the carrier should support the compression technique used in the hack. If you owns rooted device and wanna boost the 3G speed on it, then don’t wait for a single minute, just follow the below steps.
We get asked to recommend the best Android launcher all the time and we're constantly on the lookout for new ones with which to spice up our smartphones. An alternative launcher provides tons more customization options for your home screens, app drawer, folders and widgets, as well as near complete control over how your phone performs when switching screens, launching apps and so on. Here are favorite Android launchers.The best Android launchers!
One of the main problems that smartphones encounter as they age is that they stop being able to cope with modern apps and new software updates. To help you defend against performance issues with older hardware, here is our guide for how to increase phone RAM, both with and without root access.
Find out how to increase your smartphone RAM right here!
The Samsung Galaxy S3: for many, the most well-rounded Samsung smartphone ever. Even years after it was released the S3 is still proudly assisting many Android fans' lives. If you're a life long S3 lover or recent convert, we've pulled together the ultimate guide to Galaxy S3 tips and tricks, features, tweaks and hacks to help you get the most out of your phone and have a bit of fun with it too.
Record and save music from the FM tuner
Granted, listening to the radio isn’t so popular anymore considering you can get music streaming from Spotify or Stereomood among the many other services, but radio has less of a draining impact on your battery (not to mention doesn’t use your mobile data). If you don’t have a ton of songs already saved on your microSD card, or you're looking to free up some space, radio is a good option. You can even record FM radio and store it on your internal memory!
Samsung's newly released phablet flagship is making a splash worldwide, however many users don't want the huge array of pre-installed apps that Samsung usually implements into its devices. These are impossible to get rid of without rooting the device. Here is how to root the Galaxy Note 3 N900 and N9005. On your mark, get set, grab your phone, Go!
First, it's important that you are aware that, as always when tampering with your phone, there are risks involved and you could wind up with a ''brick'', a useless hunk of plastic good for the garbage. Not only that, rooting your phone, meaning accessing the core of your phone's software which is normally off bounds to users, will eliminate the manufacturer warranty. Neither AndroidPIT nor I will take any responsibility for damages incurred. If you are prepared for the risks and follow the steps exactly as outlined, let's get started with the tutorial.
Ads and pop-up windows on your
computer are one of the most annoying things in the world, and that's
why practically everyone has a pop-up and ad blocker installed on their
desktop. But for some strange reason not everyone bothers to do the same
thing for their Android - and then suffers from various sites that pop
up more windows and tabs than you can poke a honey-covered stick at (for
catching the pop-ups with, you see). Suffer no more! We'll show you the
best way to block ads, including pop-ups, on your Android and save some of your precious data at the same time. You can disable ads, video ads, sound ads and pop-ups (as well as all ads!)
It’s not likely for Adobe Flash Player for Android
to receive any further development and as the program now stands, it’s
not compatible with the newest version of Android, 4.4 KitKat.
Nevertheless, there are still certain web pages with Flash content that
users want to be able to see on their mobile devices. Firefox is now
bringing Flash Player back! Version 27 of the program can now be
installed again as a plug-in. Today we’ll guide you through the few
steps to get this done.
The latest version of Android
doesn’t natively support Adobe Flash Player with means that there are
some incompatibility issues with some websites. For some, this isn’t a
big deal, but one of the wonderful things about Android is having the
choice for features. As we’ve done in the past, we’ll show you how to get flash player on your Android 4.4 device.
Again and again we get asked how
to install and use Adobe Flash Player with a new version of Android,
such as Android 4.2 or even the brand new Android 4.3. Getting Flash
Player to work on Android devices is easy, and we'll show you how in
just a few simple steps. Ready for Flash? Then let's get started.
Destroy Gunners SP for Android is very
popular and thousands of gamers around the world would be glad to get it
without any payments. And we can help you! To download the game for
free, we recommend you to select your phone model, and then our system
will choose the most suitable apk files. Downloading is very simple:
select the desired file and click "download free Destroy Gunners SP
apk", then select one of the ways you want to get the file. Just a few
easy steps and you are enjoying full version of the game for tablet or
phone!
Download Destroy Gunner SP Iceburn 2 Full Free Android 3D Game.
Download android market game without paying.Its full version with direct
mediafire link.Destroy Gunner SP IceBurn is the second edition of
Destroy Gunner series.Iceburn II give you Amazing experience of 3d game
on your android mobile, Tab, PC.3D Robotic Fighter is more realistic in
this series with new armors. So quickly download destroy Gunner SP
Iceburn II and and enjoy yourself.
Heavy Gunner 3D l Version:1.0.8 | Size:33.40MB
Developers:Com2uS | Language:English
THE ULTIMATE 3D INTER-GALATIC SHOOTING GAME FOR ANDROID!
★2nd place for the 2011 Best App Ever Awards - Arcade Game
Selected as Top Android Game - Honorable Mentions
The Ultimate inter-galactic shooting game in 3D!
With dual stick control, you can blast your enemies from each side & control the aim of your weapons independently.
In this trick your Symphony W20 and W30 will root in one click. I have tasted the process myself. I think this is the easiest way to rooting Symphony W20
I have root the Symphony W20 with E-root desktop application.
Root process isn’t 100% safe. It will destroy your phone Warranty. Before Root your Android device please read. Why for root : You will get many advanced advantage in a rooted android device.
1. You can delete unwanted system apps.
2. You can backup all system and user apps + data.
3. You can backup your phone call logs, sms logs, setting etc.
4. You can integrated updated apps into ROM.
5. You can install custom ROM for batter performance.
6. You upgrade android version some of Android device.
7. You can change boot sound, boot animation, system ring tune etc.
8. You can over clocking CPU and GPU of Android device.
In Android Market there are many custom ROM’s are available for
Samsung Galaxy Y Gt-S5360. Creed's Fusion v3.1 is also one of the best
custom ROM for Samsung Galaxy Y Gt-S5360. Here the tutorial is to how to
install this Creed's Fusion v3.1 custom ROM on Samsung Galaxy Y. The
features about this ROM has been listed below.
Here the tutorial to install Android 4.4 KitKat like android Custom
ROM on Samsung Galaxy Y GT-S5360. This is done by the help of Cyanogen-mod Kernel. Note: It is your OWN risk. We are not responsible in-case any damage during the process.
How to Install Android Kitkat on Samsung Galaxy Y GT-S5360
Requirements:
Before going to install this android kitkat custom rom you must root your android device
Keep your mobile battery level above 70%.
Enable USB Debugging in your mobile by Goto -> Settings -> Developer Options -> USB Debugging.
Usually, Android-based smartphones purchased through various carriers
are bundled with specific branded apps that may or may not be protected.
Users who cannot afford to buy free-of-contract devices might want to
remove these applications without tempering with the operating system.
Unfortunately,
carriers that bundle their own-branded 3rd-party apps install them
right into the Android operating system and not on the memory card, like
you'll usually see. Since a normal user won't have access to the
Android OS where the app is installed, they won't be able to remove it.
One wrong move, navigating too quickly or an evil bug: there are many
unfortunate events that can lead to accidentally deleting a file, video
or pictures. But not all is lost! Today we’ll show you how you can
recover these lost files that you hold dear from the catacombs of
Android with two easy methods.
There are literally a million ways to care for your Android display Some basics:
Keep it clean. This should be obvious, but foodstuffs, water, dirt and moisture are not friends of your touchscreen.
Protect it. If you're prone to dropping your phone (you know who
you are) then invest in a bumper case. If you're more intense with your
little ''accidents'' then get some serious Android armor that includes a
flip cover for the front of your device specifically.
If your phone - no matter what phone you have - is feeling bogged
down like Artax in the swamp in The Neverending Story (yeah, some of you
know what I'm talking about) then here's a quick couple of tips to speed up your laggy Android:
Sony debuted its latest smartphone in the Xperia lineup called Sony
Xperia ZL January this year and it seems the phone’s really getting some
good feedback from users all over the world. Packed with all the
high-end features, the device promises to provide better performance to
users and maybe it’s likely users would buy this device rather than
going for a Samsung one. As with every Android device, a root method has
become available for the Xperia ZL and it takes no more than a few
minutes to perform it and get the result. After gaining root access on
your device, you’ll have more control over your device than before, like
you’ll be able to modify the system-files which isn’t possible with no
root-access. This guide shows exactly how you can root your Sony Xperia
ZL smartphone, so let’s get started with it
If you've already tried a Factory Reset on your HTC One M8
and it hasn't solved your problem, the next step might be a Hard Reset.
A Hard Reset is basically the same as a Factory Reset but you do it
manually with the hardware buttons. You also have a little more control
over what gets deleted.
First of all you need to first make sure Fastboot is disabled in Settings > Power.
With your HTC One M8 switched off, hold down the Volume Down button and press Power
until you see the screen with three Androids at the bottom. If you just
want to do a Factory Reset with the hardware buttons you can do it on
this screen. Using the Volume buttons, scroll down to Factory Reset and
use the Power button to confirm. This will Factory Reset the device.
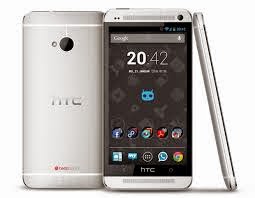
HTC’s newest flagship, the One (M8),
is a great smartphone with the best in hardware and software. If you
want to get more out of your device, and be able to do a bunch of
modding, flash some great custom ROMs and have overall more control over
it, you’ll need to root it first. Today we’ll explain how to do it
using the Toolkit program.
Warning
This rooting tutorial will likely void the warranty on your HTC One (M8).
When rooting your device, ensure that you follow each step as
described below and that you only use firmware that is designated for
your device model or version.
Also, before going ahead with the rooting process, make sure you
backup all of your phone’s data. There are various methods and apps to
do this, you can also copy everything onto your PC.
HTC recently rolled out Android 4.2.2 Jelly Bean software update for
the HTC One which runs Android v4.1.2 out of box. Along with Android
4.2.2 upgrade, the official software brings an array of features to the
Sense 5 UI. The update also adds several notable enhancements and bug
fixes.
A factory reset is a good way to fix some software related problems
on your HTC One. This should however be one of your last resorts, there
are often less intense methods to fix many of your Android problems. You
can even just turn your phone off for a while and then restart it. Or
remove the battery. These are also effective solutions.
The easiest way to perform a Factory Reset is from within the menu settings: Settings > Privacy > Factory data reset (check Format
USB Storage if you want to wipe SD card content) > Reset phone >
Erase everything.
Please remember to back up any data you want to keep first!
Performing a Hard Reset on your device is easy. The difference between a Factory Reset and a Hard Reset is: Factory Reset
The 'lighter' of the two reset options. It can be done either in
settings or via recovery menu. It wipes all user data and firmware
settings, but leaves the contents of your SDcard intact.
Performing a Factory Reset on your device is very easy. The difference between a Factory Reset and a Hard Reset is:
Factory Reset
The
'lighter' of the two reset options. It can be done either in settings
or via recovery menu. It wipes all user data and firmware settings but
leaves the contents of your internal SD Card intact.
Performing a Hard Reset on your device is simple as pie. The difference between a Factory Reset and a Hard Reset is:
Factory Reset
The
'lighter' of the two reset options. It can be done either in settings
or via recovery menu. It wipes all user data and firmware settings but
leaves the contents of your internal SD Card intact.
How to install the custom ROM CyanogenMod 10.1 on Galaxy S2 I9100G
Warning:
Neither AndroidPIT nor I will take any responsibility for damages.
Please make sure you follow all the rules carefully without skipping any
steps otherwise you could brick your phone.
Ensure that your phone has been charged to at least 70%.
Enable
USB debugging on your phone. Do this by going through all apps →
Settings → Manage Applications → Development → USB Debugging → check
box.
All you Galaxy S2 Power users out there - come and get it!
This build
is very much near perfect so we believe that Samsung will actually
start rolling out the Official Jelly Bean update for the Samsung Galaxy S
II very soon. The day Samsung starts to roll out the official update
you will be able to install the latest update through Kies or OTA
update.
Install necessary USB Drivers for Galaxy S5 on the computer.
USB Debugging Mode should be enabled on the phone by navigating to Settings >> Developer Options.
Back up your important data using Helium app
At least 80 percent battery charge.
The CF-Auto-Root tool provided in this guide is compatible with
Galaxy S5 (SM-G900F) only. Do not attempt installing it on incorrect
variants as it may brick the device. Verify the model number of the
Galaxy S5 by navigating to Settings >> About Phone.**
The easiest way to perform a Factory Reset on your Samsung Galaxy S5 is from within the menu settings:
Settings > User and Backup > Backup and Reset > Factory Data Reset > Reset Device > Delete All/Erase Everything.
Please
remember to back up any data you want to keep first! In the Factory
reset screen you also have the option to Backup My Data and Auto
Restore. These are good options to tick before you Factory Reset if
you're not too sure how to do this on your own.
If you are having problems with a very laggy, glitchy Galaxy S5 and
no other solution seems to be working, you can perform a hard reset in
order to fix these issues. This should really be done at a last resort
because it erases all of the data on your phone and reverts it back to
the way it was when you first got it. A factory and hard reset basically
are the same thing but a factory reset, which we explain in another
thread (factory reset Galaxy S5) uses the software features of the phone, while a hard reset uses the hardware buttons.
Before doing anything though, you want to make sure that you have
backed up all of your data beforehand, which you can do right in the
settings under factory reset, or you can use an app like Carbon for
Android, Super Backup, App Backup & restore, Titanium Media Sync, G
Cloud Backup. You can also backup your data to an external drive: you
can backup your Android data as a copy of the SD card that you keep on
your PC by connect your Android to your PC via the USB cable for
example.
Warning! This rooting process is only for the Samsung Galaxy S3
GT-i9300 running on Android 4.1. Rooting has a lot of risks if you
don't follow all the steps as indicated and if you mess around, you may
end up with a useless brick of a phone. To avoid the chance of losing
your files, please back up your data completely before starting this
process. Neither AndroidPIT nor I will be held responsible for any
damages or loss of data.
This tutorial is exclusively for the Samsung Galaxy S3 4G LTE GT-i9305 model running on Android Jelly Bean 4.1.2 XXBLL5. If you try to flash another model or Android version with this root, you could break your smartphone.
Neither
AndroidPIT nor I will be held responsible for any damages or losses of
data. Make sure you have completed a full backup of your files before
starting. Not sure what rooting/flashing/ROMS even are? Check out our Rooting for Beginners Q&A's and some custom ROMS that may be at your level.For check this search in this site.
Again, do NOT try this on your Galaxy S3 i9300!!!!!
Prerequisites
Activate the USB debugging mode on your S3. To do this, simply go to Settings → Developer options → USB debugging.
Make
sure that the drivers for your Galaxy S3 have been installed on your
computer. In order to do this, connect your smartphone to your PC with
your micro USB cord and wait until your smartphone is recognized by
Windows.


.jpeg)


.jpg)
.jpg)
.jpg)
.jpg)


![Install Android 4.3 on Galaxy S4 tutorial [Update: Official firmware]](https://blogger.googleusercontent.com/img/b/R29vZ2xl/AVvXsEjucNK5SH_tRQnDw_umonbv5ese5ypt0jJzjt5ORYNA3Xvm-DCgeg8Djw68WqfyfUika-Bkb0quJnrfC-VU9NH8GG3LDDYFrjls2X0Q5oxszBKqVWCyJyBBoqbCSusDEYHQtd-XJFochAqK/s72-c/galaxy-s4-4-3.jpg "Install Android 4.3 on Galaxy S4 tutorial [Update: Official firmware]")
